Kunal2045's Conversions!
Lamborghini Sesto Elemento Police now Released!
-
Triple_X

- MM2X Very Active User

- Posts: 1865
- Registered for: 14 years 2 months
- Location: Gjakova, Kosovo
- Contact:
while exporting you know when it comes the window and you click usual vehicle in the right there is a check box that you have to tick it it says multiplecolor then replace the names the default i think it is _blue you replace it with whatever your textures are named for myself i choose this kind of name body_paint body_paint1 and so on . to add more then 2 just click add and write the next name only the back part _paint(1,2,3,4,.....)
[color=white][b][u]MM2X Awards : [/u][/b]
[img][/img] | Funniest Active Member [/color]
[img][/img] | Funniest Active Member [/color]

-
Franch88
- MM2X Admin

- Posts: 15758
- Registered for: 16 years 10 months
- Location: Italy
- Been thanked: 1 time
- Contact:

That's ok Agustin, but if he has exported the car with only one paintjob, as seems, with the File Browser tool of the MM2 City Toolkit you can't do anything, you must re-export the car in .pkg file but this time adding the other paintjobs. In this part of the Silent1Unknown's MM2 car modeling and making tutorial is explained the step of multiple paintjobs making during the exporting.
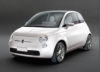
Fiat 500 = Italian motorization. Franch88, MM2 eXtreme forum and website Administrator.
|Franch88's MM2 Releases|
|Franch88's MM2 Releases|
-
Zac4084
- MM2X Super Active User

- Posts: 4058
- Registered for: 15 years 3 months
- Location: England
- Contact:
Easy to do, just while export, select paintjobs, erase the data on already, put in the first texture paintjob name, say it's kuncar_white, put in only _white, then, put in the first (on the car in ZM, applied texture), then in replace, put in the one after, keep doing this, only change 'replace', then export.


-
aaro4130
- MM2X Super Active User
- Posts: 2405
- Registered for: 15 years 10 months
- Location: Canada
- Been thanked: 1 time
You have too many, look at your materials list
it will say
vehlights0
vehlights1
vehlights0
vehlights1
DELETE ALL LIGHTS MATERIALS!, then load vehlights to default material then it will show up
it will say
vehlights0
vehlights1
vehlights0
vehlights1
DELETE ALL LIGHTS MATERIALS!, then load vehlights to default material then it will show up
[img]https://i61.tinypic.com/25zrngo.jpg[/img][color=white]
- Most creative active member
- Most smart active member
- Best MM2 innovation of the year
- Best programmer
[img]https://i60.tinypic.com/2m4c2h5.jpg[/img]
- Most helpful active member[/color]
- Most creative active member
- Most smart active member
- Best MM2 innovation of the year
- Best programmer
[img]https://i60.tinypic.com/2m4c2h5.jpg[/img]
- Most helpful active member[/color]
-
Triple_X
- MM2X Very Active User
- Posts: 1865
- Registered for: 14 years 2 months
- Location: Gjakova, Kosovo
- Contact:
the problem is that you used the material vehiclelights128.tga in the light two or more times in a row and while exporting zmodeler does this thing and the textures aren't shown in the game .
open the file in zmodeler select the BODY_H>>check SEL>> Create >> Object >> By material >> split , then click in wich one of the view you want accept teh 3D one now the car is splinted by materials start hiding one by one and let showed only the light one when you have done this select only those two you can select them like this : left click on the object >> select , then open material editor (E) the go to the first material named vehiclelights but be sure it is RR or RL inside the "[ ]" cus FR and FL or for the front lights when you click the vehiclelights material click assign to selected and your done now you can merge the car and reexport it
or if you detach the lights to make the TLIGHT_H but you didn't make a copy for the body that can be the issue
[color=white][b][u]MM2X Awards : [/u][/b]
[img][/img] | Funniest Active Member [/color]
[img][/img] | Funniest Active Member [/color]
-
Franch88
- MM2X Admin
- Posts: 15758
- Registered for: 16 years 10 months
- Location: Italy
- Been thanked: 1 time
- Contact:
Very nice look in-game, and good lights placing.
Do what Triple_X says about the tail lights, applying to them only one material with the lights texture. Don't use more than one material with the same texture assigned, or will happen that, I've said this thing other times.
Do what Triple_X says about the tail lights, applying to them only one material with the lights texture. Don't use more than one material with the same texture assigned, or will happen that, I've said this thing other times.
Fiat 500 = Italian motorization. Franch88, MM2 eXtreme forum and website Administrator.
|Franch88's MM2 Releases|
|Franch88's MM2 Releases|


The lights have been fixed, and so the the rest of the car, thanks Franch! 
And now the Dukes from GTA IV, converted to San Andreas by Mad Driver, and now for Midtown Madness 2 by me, and my very first conversion is...................
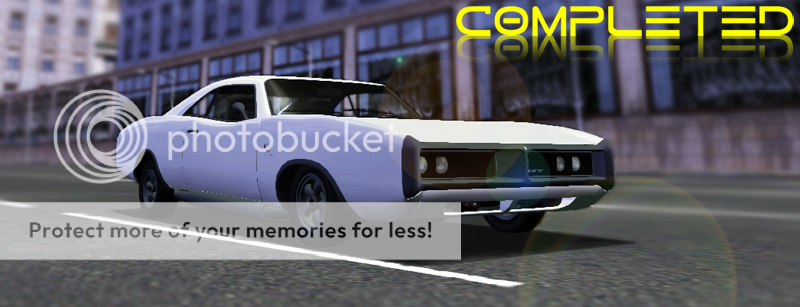
Thats right. It is.
Plus, here are some features in this vehicle:
New model = Yes
3D interiors = Yes
3D wheels = Yes
Driver model = No
New textures = Yes
Dashboard = No
Damages = Yes =========== No damage textures or detachable parts
New tuning: Yes
New sounds: Yes, from Riva's Charger R/T (THANKS RIVA!)
Number of colors: 6; With names.
Franch has the file, so soon it will be ready to be uploaded for the release, so stay tuned for the announcement.
And now the Dukes from GTA IV, converted to San Andreas by Mad Driver, and now for Midtown Madness 2 by me, and my very first conversion is...................
Thats right. It is.
Plus, here are some features in this vehicle:
New model = Yes
3D interiors = Yes
3D wheels = Yes
Driver model = No
New textures = Yes
Dashboard = No
Damages = Yes =========== No damage textures or detachable parts
New tuning: Yes
New sounds: Yes, from Riva's Charger R/T (THANKS RIVA!)
Number of colors: 6; With names.
Franch has the file, so soon it will be ready to be uploaded for the release, so stay tuned for the announcement.
[align=center][color=black]Sig[/color]
[img]https://www.imgweave.com/view/4838.png[/img][/align]
[img]https://www.imgweave.com/view/4838.png[/img][/align]

-
Silent1Unknown

- MM2X Super Active User
- Posts: 2472
- Registered for: 15 years 11 months
- Location: Canada
- Contact:


